Sourdough Brioche Buns

After a lot of trail and error I’m finally feeling pretty good about these brioche buns. I extended out the fermentation cycle which makes the process a bit longer, but it pays off with the end result - a lighter, airier brioche that is perfect for sandwiches, burgers, or French toast. Video of the process below.

burger 1.jpg

Ingredients

250 g bread flour

90 g eggs (about two medium sized eggs)

50 g butter (cubed)

50 g white sugar

45 g water

5 g salt

100 g active starter

1 more egg for brushing on before bake

*This recipe is a small batch of 4 buns. Multiply according to how many you want.

From start to finish this takes about 44 hours total.

dough in bowl.jpg
shaped balls.jpg
finished buns.jpg

Directions

  1. 9am Day 1- Feed/activate your starter. I won’t go into too much detail here about starters, levains as there are many other amazing resources already available online - but I find that it is essential for this recipe that you are working with a very active starter when you get to the next step of mixing.

  2. 12pm Day 1- Mix all of the ingredients together in a stand mixer. It is possible to do this by hand but it will take a lot more time and effort to achieve the same result as the mixer. With the butter, eggs, and sugar this dough really needs to be worked together more than a regular loaf of bread. Start off on slow and gradually increase the speed for 15 minutes, periodically scraping the edges of the bowl with a rubber spatula. The dough will be somewhat sticky, but after 15 minutes it will be smooth, homogeneous, and should hold together nicely.

  3. 12:15pm to 8:00pm Day 1- Transfer to a metal proofing bowl and cover and leave out at room temperature for the first fermentation cycle. Key here is that the dough should be folded 4 times over the course of this cycle to develop the gluten and structure of the bread. After mixing I will wait about 30 minutes before doing the first fold (by hand). Let the dough relax again for about another 30 minutes and do the next fold, and so on. Keep the dough covered when not folding it. It will get progressively easier, smoother, during each fold.

  4. 8pm Day 1- Transfer the dough to the refrigerator for an overnight cold ferment.

  5. 8am Day 2- Remove the dough from the refrigerator and leave at room temperature for about 10-15 minutes. This will give it a little time to loosen up and not be so stiff coming out of the refrigerator. Gently dust a work surface with flour and dump the dough out. Divide into 4 equal pieces. Gently pull the edges of each piece out and fold over on top of itself. Rotate as you go and you’ll begin to form a small, smooth, ball of dough. Work carefully not to tear the dough. Turn the ball over and continue to shape the dough, working the edges downwards and folding underneath. The video I’ve made will help with visualizing this part of the process.

  6. 8:15am to 8:00pm Day 2- Lightly flour a tray and set your dough balls inside, leaving a few inches of space between to give them room as the continue to proof. You’ll need to cover them during this step. You also don’t want the dough pressing against whatever cover you’re using. If using plastic wrap or foil I will place an object in that is taller than the edges of the tray so that it creates a tent. Since I’m not working in a professional kitchen setting and don’t have access to equipment to control humidity I will ball up some wet paper towels and stick them in the edges of the tray during this part of the process to keep some ambient humidity as they proof at room temperature.

  7. 8:00pm Day 2- Transfer the entire covered tray into the refrigerator for the final cold phase of proofing.

  8. 7am Day 3- Remove from the refrigerator and allow to come to room temperature for about 30 minutes. Set your oven to 425F. I bake directly onto a baking stone for this recipe and use parchment paper as a barrier between the buns.

  9. Transfer each dough ball (carefully so they keep their shape) onto parchment paper. Brush each dough ball with egg wash. Using a bread lame, slash the tops of each ball in an X pattern. Using a pizza peel, or large spatula, transfer to the baking stone. I like to use a big pizza peel, so all my dough balls are on the same piece of larger parchment paper. You could just as easily cut individual pieces of parchment for each dough if necessary.

  10. Bake at 425F for 15 minutes until golden brown. Remove from the oven and allow to cool for at least 15 minutes before slicing.

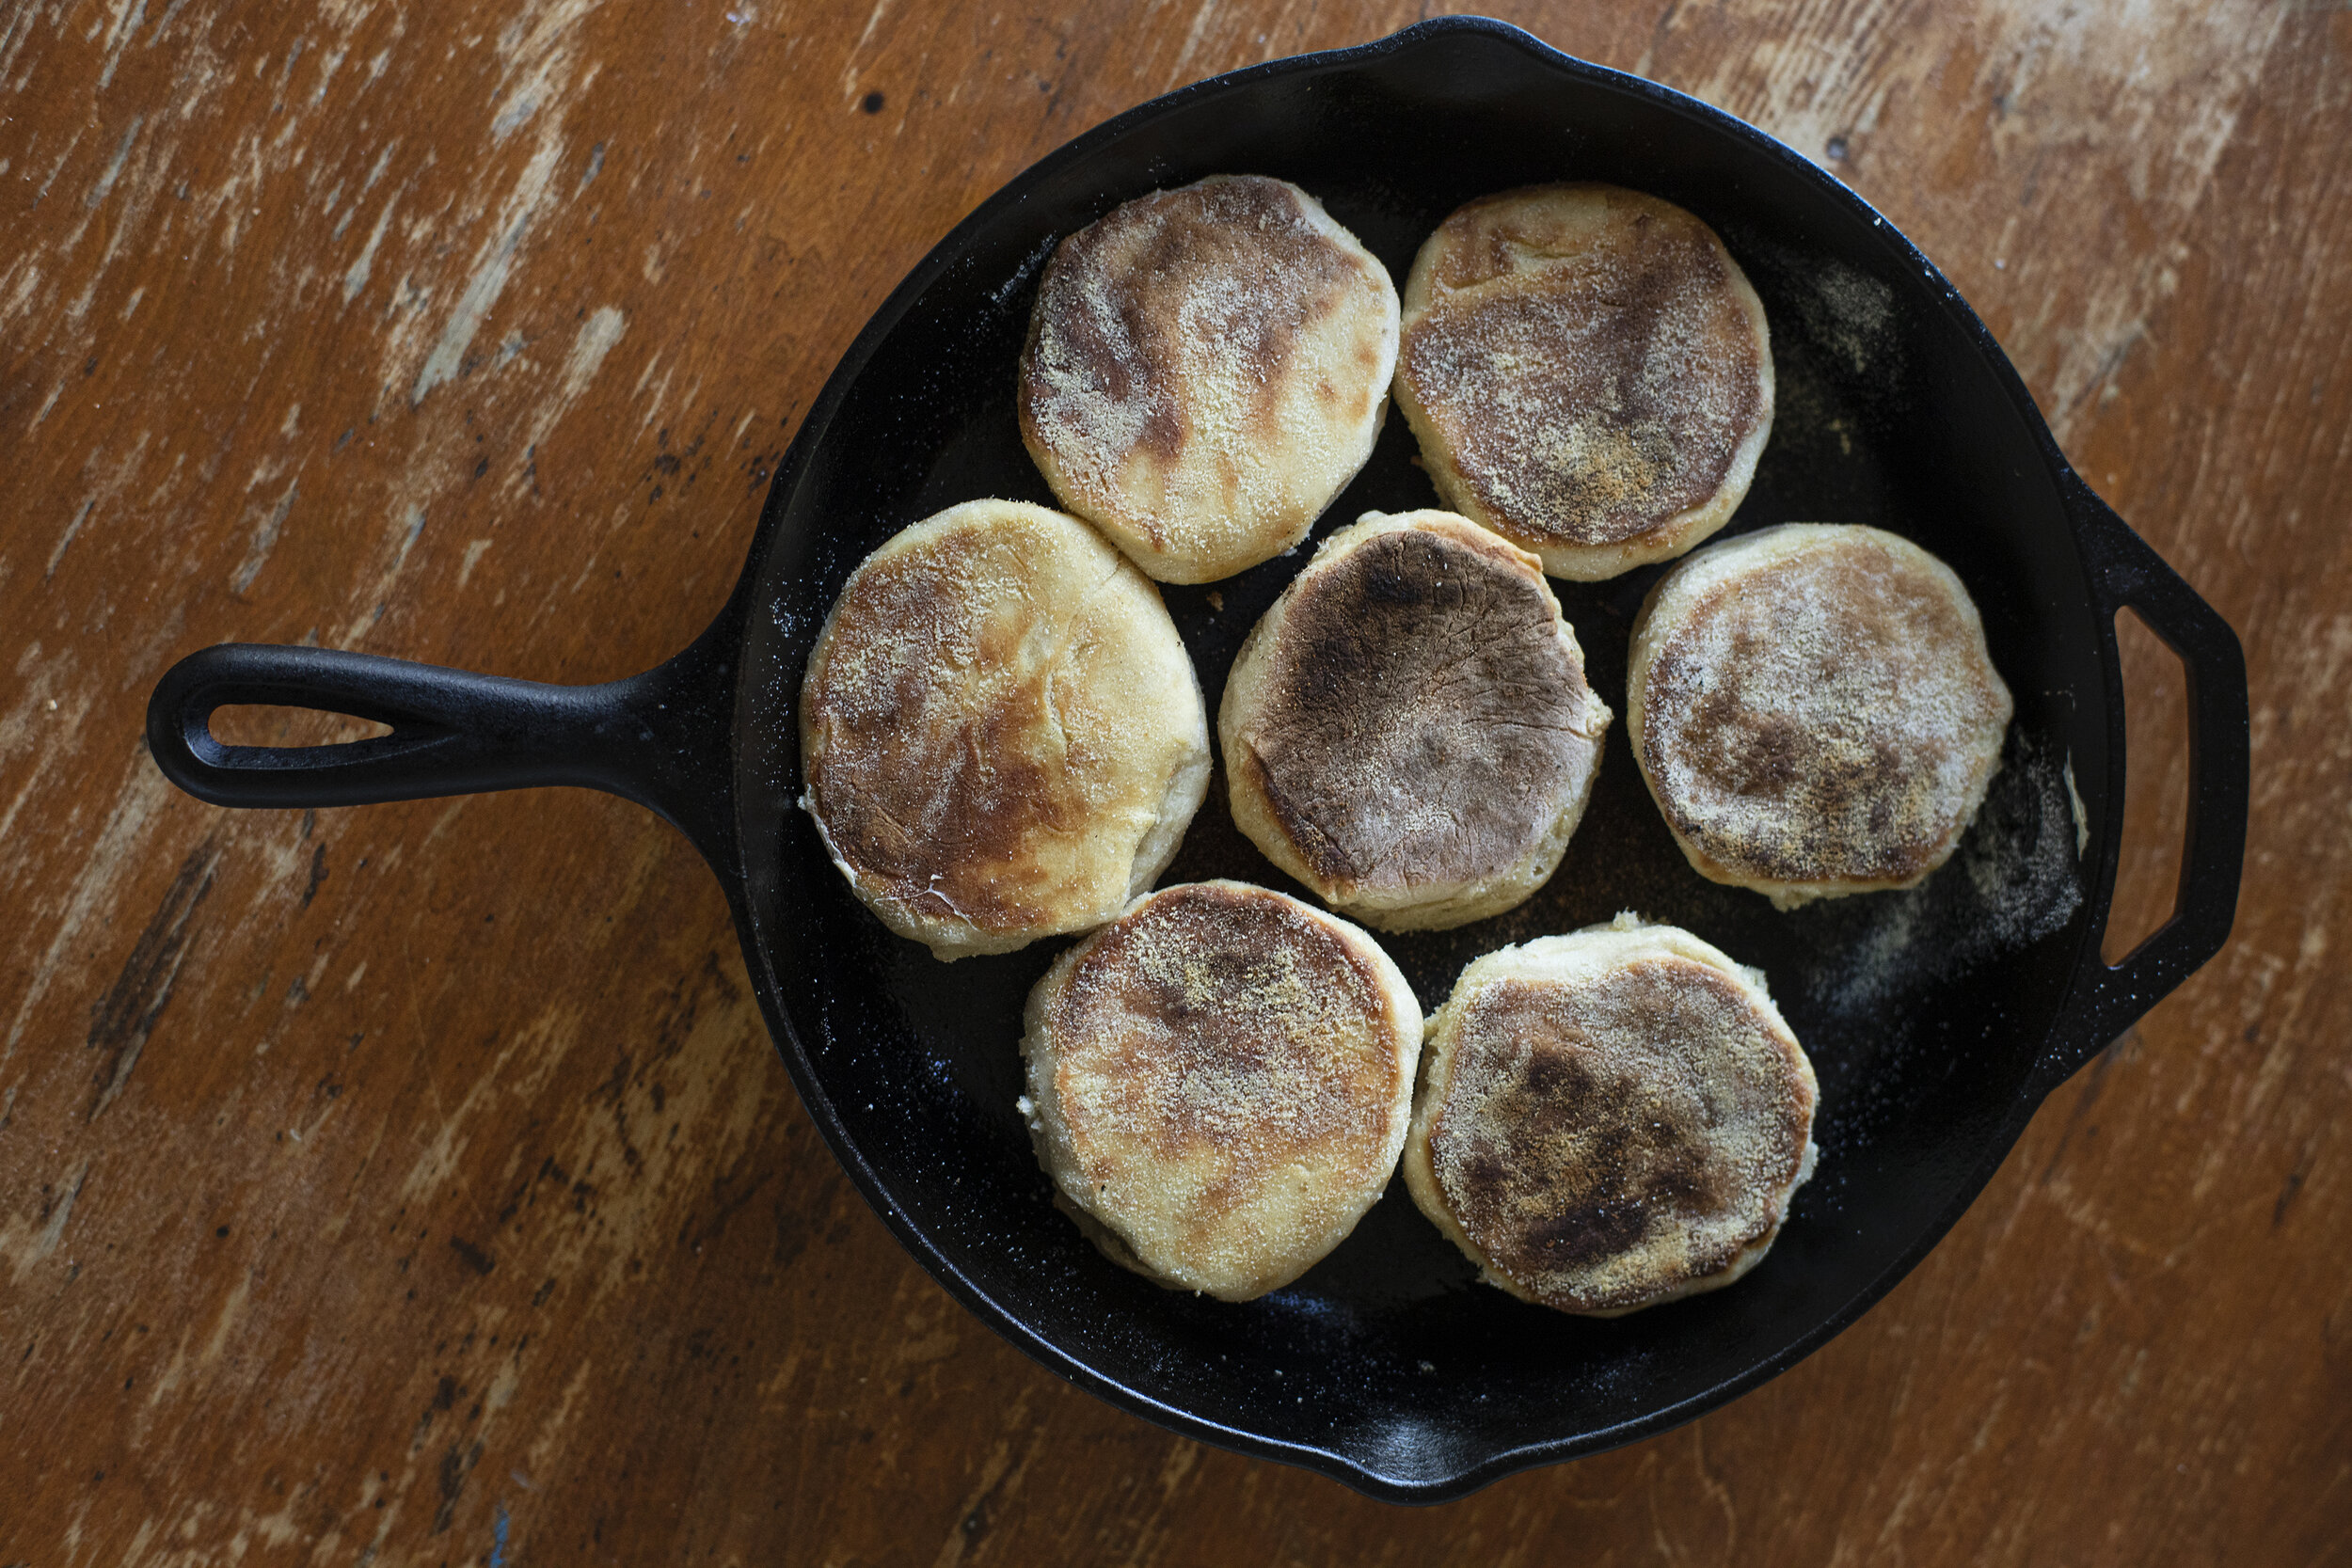
  11. For burgers and sandwiches I like to toast these in a lot of butter straight onto a cast iron pan, with a lid so they steam a little while they toast up. You’ll definitely miss out if you skip this step.
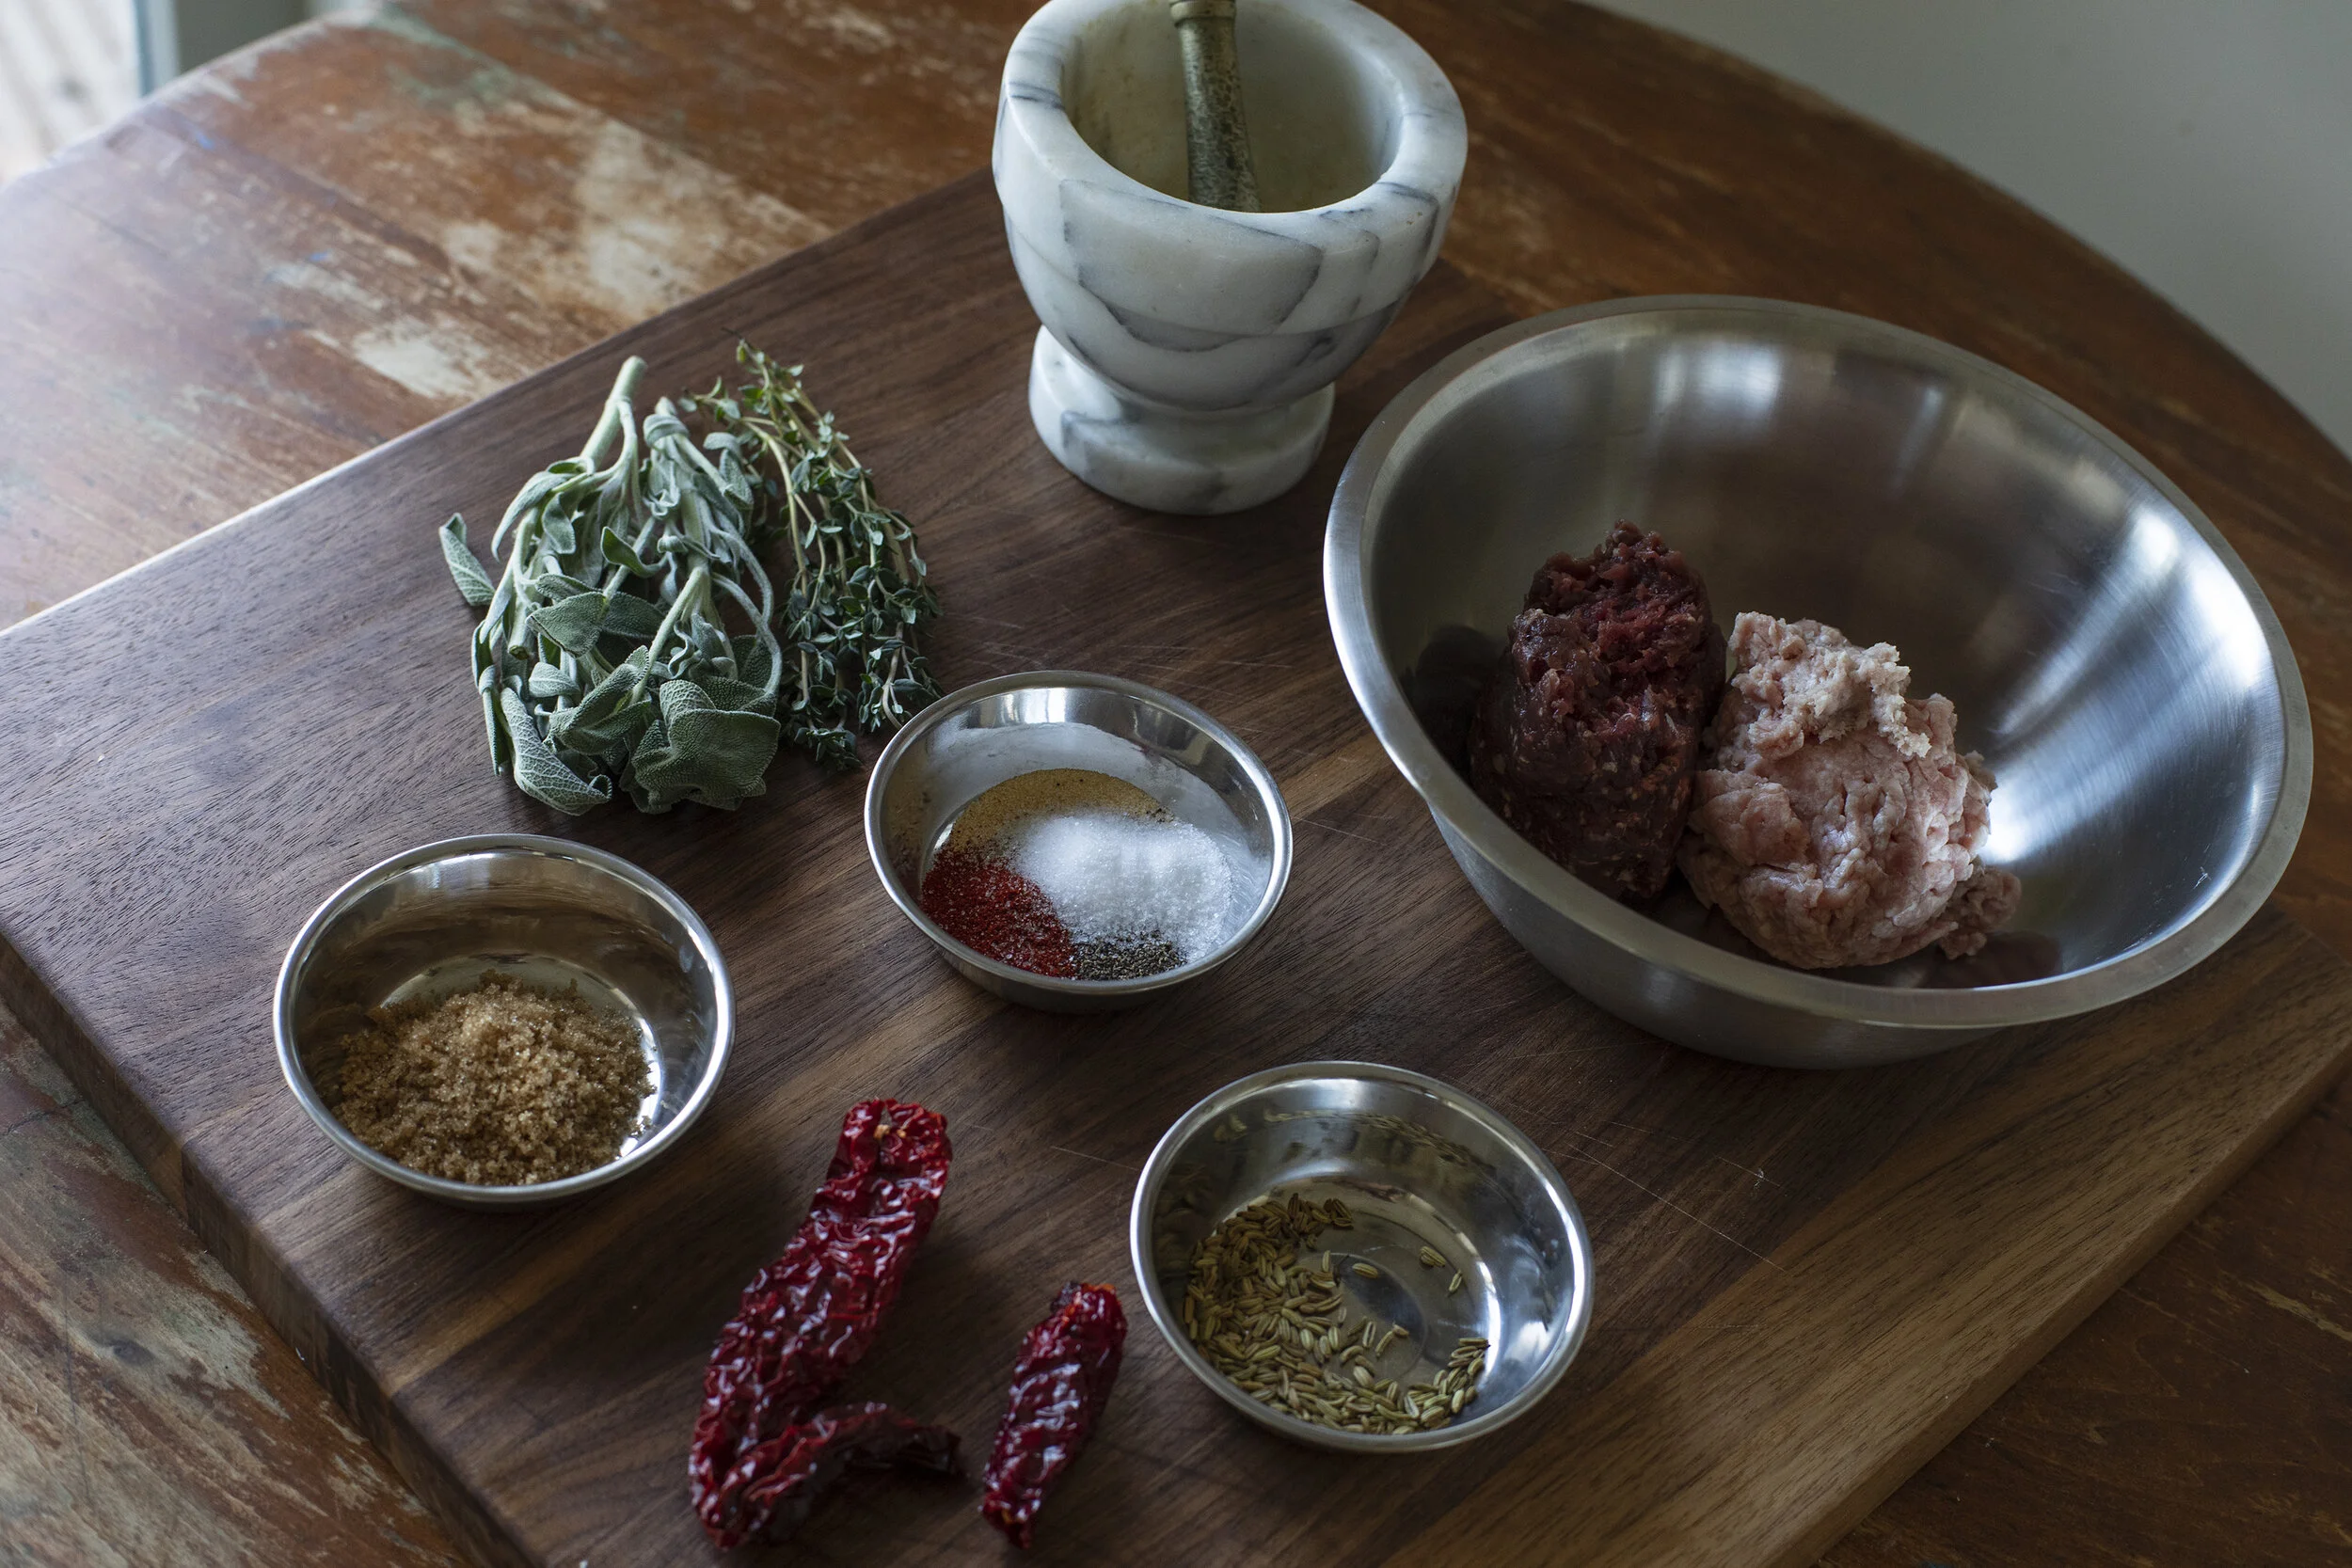
brioche crumb.jpg

The Smash Burger

This burger uses a 60% venison 40% ground pork mix but would be just as good using 100% beef. The patties were pressed out between two sheets of parchment and kept cold until ready to cook. They’re seared on a hot pan or griddle until a strong crust begins to form. I flip these only once, add the cheese, caramelized onions, and char the second side. Because they’re so thin you’re not worrying about them being rare or medium rare. The juiciness will come from the rendered fat, melted cheese all coming together with the amazing crispy crust. Slide them onto a buttered and toasted bun, slathered with whatever sauce you like, press it down and enjoy.

Venison smash burger with caramelized onions, cheddar and special sauce.

Venison smash burger with caramelized onions, cheddar and special sauce.

Pork cutlet, micro-greens, lemon vinaigrette, aioli, pickled red onions.

Pork cutlet, micro-greens, lemon vinaigrette, aioli, pickled red onions.

Sourdough Bagels, Homemade Cream Cheese, and Gravlax

After a few iterations on this sourdough bagel I am finally happy to share the recipe. The texture and taste fall somewhere in between a New York and Montreal style bagel. Along with the homemade gravlax and cream cheese, this makes for an incredibly satisfying breakfast/brunch combination. A detailed video of the whole process is below.

finished bagels with lax.jpg

The Bagels

The whole process takes about 22 hours from start to finish and a little bit of smart planning. Ultimately it is a very approachable recipe if you have the right ingredients on hand. I typically start my process around noon on day one and bagels will start coming out of the oven around 10am the next morning. These bagels are approximately 55% hydration which seems to be the gold standard when researching recipes.

Ingredients (for 5 bagels)

250 g water

65 g active sourdough starter

450 g bread flour

10 g salt

4 g barley malt syrup (for the dough)

3 g barley malt syrup (for the boiling water)

1 tsp baking soda (for the boiling water)

semolina (for dusting the tray)

Sesame and poppy seeds (for topping)

*The one ingredient you’re most likely not to have in your kitchen is the barley malt syrup. While it is possible to make bagels without it, it does serve a very specific purpose and is what many New York / Montreal bagel makers use in their formulations. It adds color, sweetness, and helps to condition the dough through the enzymatic processes that it contributes. If you don’t have barley malt syrup, you can use honey, brown sugar, or molasses to add a touch of sweetness - but keep in mind they function very differently.

Instructions

  1. Mix all of your ingredients together in a stand mixer with the dough hook (except for the additional 3 g malt syrup, baking soda, and semolina). Mix for about 10 minutes starting at the slowest setting and gradually increase to medium speed. This can be done by hand but it will take a lot longer to get to the right consistency. When fully mixed the dough should be tacky to touch, but not overly sticky. Cover the bowl and let ferment for 3 - 4 hours at room temperature depending on how warm your area is. Cooler ambient temperature will require longer ferment time.

  2. After 3 - 4 hours, dump your dough onto a clean (lightly floured) work surface and divide into 5 equal portions. Use your hands to roll each piece into a cylinder approximate 8 inches long and about an inch in diameter. Wrap the cylinder around your hand, press the two ends together, and gently roll the seam with your fingers to form a circular shape with a hole in the middle. This may take a few times to get it right, where you have uniform size all the way around each bagel.

  3. Transfer the bagels into a tray, lined with parchment paper and dusted with semolina. Cover with plastic wrap, and a light weight cloth or towel. Allow to ferment at room temperature for one more hour.

  4. Transfer the tray into the refrigerator to cold ferment overnight.

  5. In the morning, around 8am, remove the tray and allow to come to room temperature for about 30 minutes. Meanwhile bring a pot of water to a boil, mix in the baking soda and 3 g of additional malt syrup. Set your oven 500 F. Mix together the poppy seeds and sesame seeds (or whatever topping you like) in a medium sized bowl.

  6. Gently drop a few bagels at a time into the pot of boiling water. They may sink at first, but they should rise to the surface relatively quickly. Boil each side for about 1 minute each. Using a slotted spoon, transfer the boiled bagels to your tray for a few seconds, before transferring them into the bowl of toppings. Use your hands to roll the bagels around so there is a nice even coating on both sides. Transfer the bagels back into your tray. Repeat until all bagels are done.

  7. The bagels can be baked right in the tray or directly onto a pizza stone if you have one. Bake for 7 minutes and then flip, and then 7 more minutes - 14 minutes total time.

  8. Allow to cool slightly before enjoying.

Shaped and proofed.

Shaped and proofed.

Bagels will float when properly fermented and proofed.

Bagels will float when properly fermented and proofed.

seeded bagels.jpg

The Gravlax

This recipe is heavily inspired by a recipe from George Lang that my dad always used to make during the holidays. With the exception of a few minor tweaks, it is very similar to his original recipe.

Ingredients

2 pounds salmon with skin on

2 tbsp Aquavit or Vodka

1/3 cup coarse salt

1/3 cup white sugar

2 tbsp crushed black pepper

4 oz fresh dill sprigs (chopped)

Instructions

  1. Pat the salmon dry with a paper towel. Place it in a bowl or tray.

  2. Coat the salmon with the aquavit or vodka, rubbing it evening on all sides of the fish.

  3. In a small bowl, mix together the salt, sugar, pepper, and dill. Using your hands, pack the mixture onto all sides of the fish. Make sure there is an even coat all around. If some area seem like the fish is exposed, you can sprinkle on a little more salt.

  4. Place a piece of plastic wrap on top of the fish. Now you need something heavy to weigh down the fish. I use a small piece of bluestone, but anything will work. Wrap the bowl/tray/weight with another piece of plastic wrap to ensure it is completely sealed. Transfer into the refrigerator.

  5. After 8 - 12 hrs, flip the salmon over onto the other side, put the weight back on, wrap again in the plastic, and put it back into the refrigerator for another 12 - 20 hours. For a thicker piece of salmon, you’ll likely need more time so the salt can properly penetrate the meat.

  6. Remove the salmon and rinse in cold water. I like to leave a little bit of the cure on the outside, but that’s a personal preference.

  7. Now thinly slice the meat, and serve with crackers, on a bagel, or just eat it by itself.

Day 1: Packing the salmon with salt, sugar, pepper, and dill.

Day 1: Packing the salmon with salt, sugar, pepper, and dill.

Best when sliced thinly.

Best when sliced thinly.

bagels and gravlax.jpg

The Cream Cheese

It’s hard to compete with Philadelphia cream cheese, but what you’ll get by making your own is a heavenly and luxurious texture and something that feels a little more wholesome. The flavor is a bit more “farmy,” especially if using farm fresh milk and cream so it’s not for everyone - but for me the whole experience was well worth the effort just to be able to experience the difference between homemade and store-bought.

Ingredients

3 cups whole milk

3 cups heavy cream

1/4 tsp mesophilic culture

3 drops of rennet (dissolved into a tablespoon of water)

Chives/scallions (optional)

*You’re going to need a few obscure items here to make homemade cream cheese, but all are readily available either through Amazon or local distributors. Rennet, mesophilic culture, and butter cloth are all important to ensure you have success. This is a two day process, so you’ll need to plan ahead. I start my process at 2pm on day 1 and finish at about 4pm the following day.

Instructions

  1. Combine the milk and heavy cream into a heavy duty pot.

  2. Set your stove top to the lowest setting and bring the mixture up to 75/76 F. You need to pay close attention here so that it does not overheat.

  3. Once you’ve reached temperature, sprinkle in the mesophilic culture and rennet diluted in water, and stir until well incorporated.

  4. Cover and set aside at room temperature for 12 - 18 hours.

  5. When ready, you’ll notice that the whey has separated and there will be a big block of cheese that has coagulated. Take a spatula or spoon and gently break it apart.

  6. Line a medium sized bowl with a folded piece of butter cloth, and carefully transfer the cheese into it. Pull up the corners of the butter cloth, and tie it together in a tight ball. You’ll need to hang the ball over the bowl for the next 8 hours, so you may need to get crafty with how you do this. Over the 8 hours, all the whey will drain out, leaving you with a super creamy ball of cream cheese.

  7. Open the butter cloth and transfer to a clean bowl. It might seem a little stiff at first, but use a spatula to spread it around and reveal it’s velvety texture. Season with salt to your preference. Add in scallions/chives if you’d like. Enjoy!

After the rennet has done it’s work, this is the moment the coagulated cheese is broken.

After the rennet has done it’s work, this is the moment the coagulated cheese is broken.

Transferring the cheese into the butter cloth.

Transferring the cheese into the butter cloth.

Hanging the cheese for 8hrs to drain the whey.

Hanging the cheese for 8hrs to drain the whey.

The moment the butter cloth is opened.

The moment the butter cloth is opened.

chive cream cheese.jpg

Same-Day Sourdough Flatbread

The beauty of this recipe is how versatile it can be. Start it in the morning and you’ll have flatbread for dinner. It can be baked on a pizza stone, or straight in a buttered cast iron skillet. It can be spiced or left plain. The possibilities are really endless and it can conform to whatever meal your making.

baked flatbread.jpg

The Dough

Morning (Around 7am):
Mix together 95g active starter, 2.25 cups all purpose flour, 1 cup warm water, .5 tsp salt and spices if you’re using them. For Indian style flatbread I use .5 tsp tumeric and .5 tsp cumin. Mix well, cover and leave out at room temperature all day.

Afternoon (Around 4pm):

Dust your work surface with flour. Dump out dough and divide into 5 equal balls. Do a quick stretch and fold of each ball to shape as if you were shaping pizza dough. Proof for another 20-30 mins.

On floured surface, one by one, press each ball of dough down with your fingers, gently pulling the edges so it flattens out to about .25 inch. The process is very similar to shaping pizza dough.

Baking in the Oven:

Heat your oven / pizza stone to 500F. Brush each dough with a little olive oil and sprinkle with salt. Using a pizza peel, slide in as many individual doughs as will fit. Bake for about ten minutes, until golden brown and puffy. This method will yield slightly puffier flatbread than the cast iron method.

Baked flatbreads with shakshouka.

Baked flatbreads with shakshouka.

Baking in a cast iron skillet:

Heat up cast iron pan and add a pat of butter for each flatbread you make. Lay down the flatbread in the hot pan and cook for about 5 minutes on each side until it begins to puff up and get blistered in the heat. Some char marks are welcomed here. Make sure to thoroughly clean out the skillet in between each piec

Skillet cooked flatbread, spiced with tumeric and cumin, dusted with ramp powder.

Skillet cooked flatbread, spiced with tumeric and cumin, dusted with ramp powder.

Poppy Seed Rye Sourdough

Mix together 410 g of water, 360 g of bread flour, 85 g of whole wheat flour, 85 g of rye flour and set to autolyse for up to six hours. Add 15 g of salt, 7 g of cracked caraway seeds, 7 g of poppy seeds and 90 g of active sourdough starter and start working into the dough with your hands or with a rubber spatula until more or less homogenous. Let rest for 45 minutes. You’ll want to stretch and fold the dough two more times (with your hands) over the course of the next 1 - 2 hours to develop the gluten. By the end the dough should be very smooth and should not stick to your hands while folding. Cover and rest overnight at room temperature.

poppy seed rye.jpg

In the morning transfer the dough to a clean working surface lightly dusted with flour. Fold the dough one final time and shape while being careful not to degas. Gently roll the dough into another bowl of poppy seeds. Transfer into banneton, cover and let rise for 2 - 3 hours.

poppyseed rye crumb.jpg

Set oven to 475F with dutch oven inside to heat up. Transfer the dough to a peel with parchment paper and slip it into the heated dutch oven. Using a bread laim, score the top of the dough. Bake for 25 minutes with the lid on and 20 more minutes with the lid off. Remove from the oven and allow to cool before slicing.

Sourdough Ciabatta

My first attempt at ciabatta was a total disaster. I decided to start from scratch and completely rethink the recipe. Second time around I think I nailed it. Beautiful open crumb and wonderful flavor.

holding up crumb.jpg

450 g water

53 g whole wheat flour

477 g bread flour

90 g active starter

15 g salt

18 g olive oil

*yields two medium size loaves at 85% hydration

Step 1 Autolyse - 2pm Day 1

Mix together 400 g of water and 530 g of the combined flour. Make sure there are no clumps, cover and set to autolyse for up to six hours. Note that you are reserving 50 g of the total water for the next step.

Step 2 Bassinage Technique - 7pm Day 1 

Because of the high hydration, a stand mixer makes this process quite a bit easier. You can mix by hand but it doubles the amount of time it takes to develop the gluten. 

Combine the autolyse mixture, 15 g of salt, 90 g of active sourdough starter, and 18 g of olive oil into your mixing bowl. Lower the hook attachment into the bowl and start it at the lowest setting for a few minutes. Very slowly add in the remaining 50 g of water. At this point you may begin to question whether or not it’s going to work but stay the course and the dough will start forming structure. Increase the mixer speed and continue to add water slowly. Increase the speed again. Total mixing time will take about 10-15 minutes. You’ll notice that with patience, the dough begins to form a ball and will start slapping against the sides of the bowl. Transfer the dough into a large mixing bowl or container.

Step 3 Additional Folding - 7:15pm - 9:00pm Day 1

You’ll want to fold the dough three times (with your hands) over the course of the next 1.5 hours to develop the gluten. By the end the dough should be very smooth and should not stick to your hands while folding. It will remain very wet but it should pass the windowpane test. Cover and rest overnight at room temperature. 

in couche.jpg

Step 4 Proofing - 7am Day 2

Uncover the dough and generously flour the surface. Gently pull the edges of the dough back from the sides of the container allowing flour to rolls down along the edges. Turn the container over onto a floured surface and divide the dough into two halves. The key now is to touch the dough as little as possible. Gently shape each half into rectangles and transfer them onto a well floured couche. Any clean kitchen linens will work if you don’t own a baker’s couche. You’ll want to make sure there is a barrier between the two doughs as they proof. Give another dusting of flour to the top of the dough and cover with another couche or kitchen linens. Allow to proof for another 2 - 3 hours.

Step 5 Baking - 10am Day 2 

Your oven should be set to 450F with a heatproof bowl of water on the rack to create steam. The next part can be a little tricky and you may need to improvise depending on the type of tools you’re working with. Now it’s time to get your proofed dough off of the couche, onto a peel or board, and into the oven. As long as you have floured the couche and dough liberally you shouldn’t have any issues with the dough sticking. Because of the high hydration you’ll need to work somewhat quickly and confidently. Now you’ll flip each dough off of the couche and onto your launching tool in one clean motion so that the bottom now becomes the top. I like to use parchment paper for this stage as well. For this recipe, both doughs should fit on a medium sized pizza peel and will bake directly on a stone in a medium sized conventional oven. Bake for 20 minutes with the steam and lower the temperature to 425F. Remove the bowl of water and baker for another 20-25 mins until golden brown and well risen. Remove from oven and allow to cool before slicing. 

ciabatta on counter.jpg
crumb close.jpg

Sourdough English Muffin Breakfast Sandwich

egg porn shot.jpg

This might look like an ordinary breakfast sandwich, but this thing has a lot going on. Sweet and spicy venison + pork sausage patty, melted cheddar cheese, and a fried egg on top of a homemade sourdough English muffin. This is my version of Thomas’ English Muffin where I tried to replicate the textural experience with a naturally leavened dough. They’re super easy to make once you have an active starter and dare I say better than the original. Video of the process below.

The Sourdough English Muffins

Day 1 Evening

Make your sponge with 110 g active starter, 260 g bread flour, 276 g whole milk and set out to rest overnight at room temperature for approximately 8 hours.

hand in dough.jpg
punch outs.jpg
in skillet.jpg
crumb shot.jpg

Day 2 Morning

Add another 75 g bread flour, 1 tsp of salt, 1 tsp of baking soda, 1.5 tsp of honey, and 1.5 tsp of melted butter. Knead for about ten minutes until all the ingredients are well incorporated. Flour your working surface and roll the dough out to about half an inch thick. Using a circular form, punch out circles of the dough and dust them with a light coat of semolina. Set aside and let proof for about 45 to 60 minutes. 

Lightly oil a cast iron skillet and set to medium/low heat. Cook muffins directly in the pan for about 7 minutes on each side until golden/toasted brown. Cool on a wire rack and split open with a fork.

sausage ingredients.jpg

The Sausage Patties

   1 tablespoon finely chopped fresh sage

    1 tablespoon finely chopped fresh thyme

    2 teaspoons light brown sugar

    1½ teaspoons kosher salt

    1 teaspoon crushed fennel seeds

    ½ teaspoon crushed red pepper flakes

    ¼ teaspoon freshly ground black pepper

    ¼ teaspoon garlic powder

    ¼ teaspoon sweet paprika

    .5 pound ground pork 

    .5 pound ground venison

patties.jpg

Mix sage, thyme, brown sugar, salt, fennel seeds, red pepper flakes, black pepper, garlic powder, and paprika in a medium bowl. Add pork and venison and work spice mixture into meat with your hands until it's very well blended.

Using your hands, form approximately 3 - 4 inch patties about ¼ inch thick. Griddle sausage over medium-high heat until browned on one side, about 2 minutes. Flip and cook 2 minutes more. Use a grill press to ensure a thin and crispy patty.

open sandwich.jpg

The Sandwich

Lay your split English muffin open on a cast iron skillet and top with good quality cheddar cheese. Set into a broiler until the cheese melts. Meanwhile fry your egg in another pan with a generous amount of butter. Set the sausage patty on top of the melted cheese followed by the fried egg gently placed on top so it doesn’t break. Season with salt and pepper and the top half of the muffin. The sausage is already a little spicy but add hot sauce to your liking.

Whole Wheat Oat Bran Seeded Sourdough

seeded WF baguettes.jpg

Mix together 430 g of water, 424 g of bread flour, 106 g of whole wheat flour and 15 g of oat bran and set to autolyse for up to six hours.  Add 15 g of salt and 90 g of active sourdough starter and start working into the dough with your hands or with a rubber spatula until more or less homogenous. Let rest for 45 minutes. You’ll want to fold the dough two more times (with your hands) over the course of the next 1 - 2 hours to develop the gluten. By the end the dough should be very smooth and should not stick to your hands while folding. Cover and rest for about 10 hours at room temperature. For timing, I normally will aim to start mixing in the salt and active starter around 7pm. By 9pm I leave it alone for the bulk ferment at room temperature.

In the morning (around 7am) transfer the dough to a clean working surface lightly dusted with flour. Divide the dough into 4 - 6 equal parts depending on the size and shape of the rolls you’re making. Shape each piece being careful not to degas the dough. Gently roll each dough into a mix of seeds. I like to use golden flax, sesame, and poppy seeds. Cover and let rise for 2 - 3 hours. 

Set oven to 450F. Using a bread laim, score each dough. Bake for 20 - 25 minutes with a heat proof bowl of water in the oven to create ambient moisture. Remove rolls from oven and allow to cool before slicing.

This recipe also works really well for a larger loaf which I bake in a Dutch oven t 475F for 20 minutes with the lid on and 20 minutes with the lid off. See below.

seeded loaf from top.jpg
seeded loaf crumb.jpg

Sourdough Focaccia

Mix together 410 g of water and 530 g of bread flour and set to autolyse for up to six hours.  Add 15 g of salt and 90 g of active sourdough starter and start working into the dough with your hands or with a rubber spatula until more or less homogenous. Let rest/relax for 45 minutes. You’ll want to fold the dough two more times (with your hands) over the course of the next 1 - 2 hours to develop the gluten. By the end the dough should be very smooth and should not stick to your hands while folding. Cover and rest overnight at room temperature. 

focaccia stack.jpg

In the morning transfer the dough to well oiled pan. Spread the dough out so it has a uniform thickness. Use the tips of your fingers to press down into dough to create little pockets. Drizzle more olive oil on top, sprinkle with flake salt and herbs. Let proof in the pan for another 2-3 hours.

Set oven to 450F. Bake for 20 - 25 minutes until golden brown and well risen. Remove from oven and try not to eat immediately.

focaccia dough.jpg

Sourdough Sesame Rolls

I’ve been fine tuning this recipe for a few months and finally getting to a good place. It was a lot of trial and error, and ultimately deciding that I should remove all added fats (olive oil or butter) to let the fermentation happen unaltered. I also ratcheted up the autolyse time up to 6 hours which seemed to have a big effect on the airiness of the crumb and softness of the bread.

crumb.jpg

Mix together 400 g of water and 530 g of bread flour and set to autolyse for up to six hours. Add 20 g of salt and 90 g of active sourdough starter and start working into the dough with your hands or with a rubber spatula until more or less homogenous. Let rest for 45 minutes. You’ll want to fold the dough two more times (with your hands) over the course of the next 1 - 2 hours to develop the gluten. By the end the dough should be very smooth and should not stick to your hands while folding. Cover and rest overnight at room temperature. 

In the morning transfer the dough to a clean working surface dusted with flour. Divide the dough into 4 - 6 equal parts depending on the size and shape of the rolls you’re making. Shape each piece being careful not to degas the dough. Set the balls onto parchment paper and sprinkle each piece with plain sesame seeds or poppy seeds depending on your preference. Cover and let rise for 2 - 3 hours.

rolls.jpg

Set oven to 450F. Using a bread laim, score each dough ball. Bake for 30 minutes with a heat proof bowl of water in the oven to create ambient moisture. Remove rolls from oven and allow to cool before slicing. 

roll crumb.jpg

Wood Fired: Because of the difficulty of keeping consistency in a wood fired oven, I parbaked the rolls in a conventional oven for 20 minutes, and then moved them into the wood fire to finish them off. This reduces the risk of burning but gives the bread a nice rustic flavor and crust.

proffing.jpg